Creating a Login Form

We will continue on our project. After we have seen how to make the 'Register' form, now we will create the 'login' form to connect to our application.
The first step is to create the 'ViewModel', and then we create the 'login' UI.
In the 'LoginViewModel' Class, I will add the following properties: Email, Password and 'RememberMe'.
The Password property, I can retrieve it from 'UserInputViewModel'. An optional property of boolean type 'RememberMe'.
If the value of 'RememberMe' is True: The authentication Cookie is stored in the browser even if I close it. If the value of 'RememberMe' is False: The Cookie will be deleted after the browser is closed. So I add the property 'RememberMe' with the 'Display' attribute to simplify its display.
Now, I will create the 'Login' form. Right click on the 'Users' folder, then add a 'Razor Page' named 'Login'. To save some time, I will build the 'Login' form from the 'Register' form. The title of this form is 'login'.
In 'Logn.cshtml.cs' I add a property of type 'LoginViewModel' with my 'InputLogin'. I mark the 'InputLogin' property by '[BindProperty]' to apply the data binding model.
In 'Login.cshtml', I just keep the three fields email, password, RememberMe. I also add 'asp-for'.
I will run to see the rendering, right click on 'Login.cshtml' then 'View in browser'. The 'Register' button I rename it to 'Login'. I can change the icon from the title of this form by another 'bootstrap' icon.
The part on the 'login' action I leave it for the next video inshaallah. But I activate the 'Register' and 'Login' links which is in the navigation bar. I go back to '_Layout' in the 'Shared' folder and I will make the following changes. For the 'Register' link, I add 'asp-page=/Admin/Users/Register'. For the 'Login' link, I add 'asp-page=/Admin/Users/Login'. I Check the links in the navigation bar.
video txtBrowse more
Exercise Summary
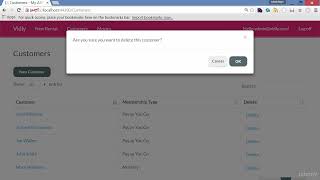
Using Bootstrap Dialog Box

ASP.NET Web Project Working Method and Monitoring
Summary of ASP.NET Core Razor Pages Training

ASP.NET Web Form Controls - 2

Using Predicate Builder for Filtering Data in .NET Core

Using ASP.Net Core Identity to Add a User

Debugging and Publishing an ASP.NET MVC Application

Creating a Login Form

ASP.NET Status Management
Implementing Pagination in ASP.NET Web API with Entity Framework Code

ASP.NET Web Page Optimization-Search Engine Optimization

Creating ASP.NET Web Forms using Visual Studio 2022

What is MVC?

Program File Configuration and Interpretation in ASP.NET Core

ASP.NET Web Form Controls-3 (Creating Web Pages Structure)

Adding Pagination, Sorting, and Filtering to Customers Table

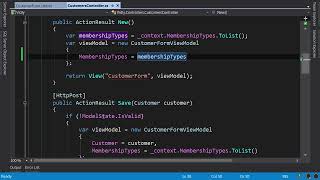
Using a Pure View Model for Form Initialization
ASP.NET Web Form Controls

Handling Entity Framework Validation Errors

Implementing Features in the Vidli App
ASP.NET Data Management and Data Link Controls-2

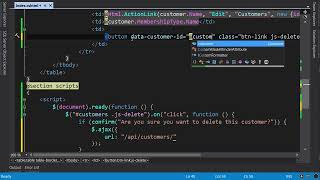
Adding a Delete Link for Each Customer
How to Solve Microsoft SQL Exception Invalid Column Name
Optimizing click event handling for buttons

Summary of 'Login' Functionality

Partial Views in ASP.NET MVC

Introduction to ASP.NET MVC
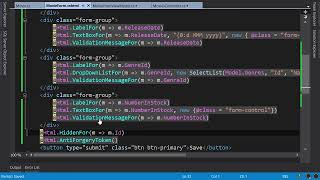
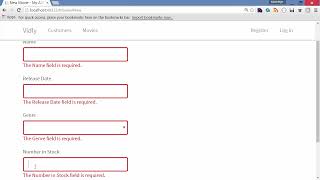
Adding Validation to Movie Form
Building APIs with ASP.NET Web API

Two workflows to use Entity Framework

Summary of Text

Summary of the text
Using AutoMapper for Object Mapping

Creating a Movie Model and Controller in MVC

Welcome to the Ultimate Guide to ASP.NET Core

Preparing the Development Environment

Summary of Text
Migrating a Visual Studio Solution to ASP.NET 8

ASP.NET Data Management and Data Link Controls-1

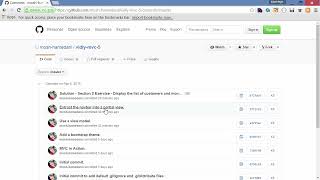
GitHub Repository for Whitley mvc-5
Summary of Student Management System Tutorial

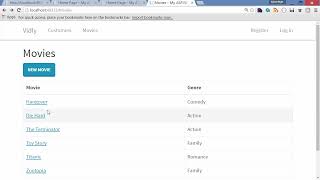
Populating Movies and Genres
